Monday, November 17, 2008

Further Frozen Failure


Despite what you might infer from the title of this post, I don't necessarily consider this attempt a failure--I simply enjoy alliteration. Nonetheless, it is most certainly not a successful attempt either, except in the sense that it gives me more ammunition with which to go back next time and try to build upon my previous attempts. Which, of course, is the whole point of my documenting these instances, so I suppose it was a total success; just not quite what I had hoped for.

Allow me to explain. As I mentioned in my previous frozen project, I have not had great success with my relatively new ice cream maker attachment for The KitchenAid. The KitchenAid itself is, of course, fantastic, and has become a staple of most anything I produce, allowing me to remain my lazy self while still enjoying the fruits of much labor. However, all of my attempts at ice cream thus far (particularly those based on corn starch, i.e., the ones that are practical to make, as I don't keep a dozen egg yolks lying around most of the time) have resulted in delicious chunks of very solid ice that resist the infiltration of a spoon with impressive tenacity. My repeated experiments have given me some insight into this phenomenon, but I am still undecided as to whether I should blame my freezer or my ice cream making technique; consequently, I must continue attempting until I find something that works right.

This attempt was no different, as I took an existing recipe (stolen this time from The Kitchn) and tweaked it to help compensate for my previous experiences. This tweaking, as you'll see, did indeed help, but not as much as I would have hoped.

Lemon Ice Cream
(As stolen from the folks at The Kitchen)

Ingredients
1.5oz Cream cheese
3 1/4c Half and half
1tbsp Corn starch
1/3c Sugar
1/4c Brown sugar
1.5tbsp Corn syrup
1/4tsp Salt
1/2tsp Vanilla extract
1tbsp Vodka
1 Lemon

Procedure
1) Place the cream cheese in the mixer bowl and process until it is softened and resembles something like cake icing.

This softening helps produce a smoother cream later on.

2) In a bowl or cup, mix 2tbsp of the half and half with the corn starch. Ensure that no clumps of starch remain undissolved and set aside.

3) Place the remaining half and half in a skillet or saucepan and set over medium heat. Mix in the sugars and corn syrup and bring to a boil. Simmer just until the sugar and syrup are completely dissolved; this shouldn't take more than a minute or so.

Stirring gently will prevent a skin from forming on the top; not necessary, but I prefer to do so.

4) Remove the mixture from the heat and whisk in the corn starch mixture. Return it to the heat and bring back up to a boil, stirring continously to prevent boiling over. Boil for about a minute and then turn off the heat.

5) Pour the hot mixture into the bowl with the whipped cream cheese and stir with a spatula to ensure that the cream cheese is scraped off the bottom and sides of the bowl. Add the salt, vodka, and zest from the lemon and set the entire mixture in the refrigerator to chill for at least 8 hours.

Note: Placing a cover of plastic wrap pressed against the top of the mixture will prevent a skin from forming on the top.

6) When the mixture has chilled, add the vanilla and the juice from the lemon to the mixture and stir thoroughly. Pour into your ice cream maker (making sure to start the churner first!) and proceed with whatever the maker's instructions say.

From this image, I don't think I let it churn long enough; that may be specific to my mixer.

7) When the process is finished, scoop the ice cream into a sealable container and place in the freezer to cure for at least 4 hours.

This picture is deceptive; the surface is actually very stiff. Oddly enough, it has a similar texture to that of over-solidified ice cream. Imagine that.

Lessons Learned
I added the vodka to the recipe in hopes of keeping it softer, as the alcohol would inhibit the freezing process. This did work, in that compared to my previous attempts, it was slightly more pliable when I took a chisel and hammer to it. That said, it wasn't enough; next time I think I'll bump up the mixer speed (to incorporate more air) and add an additional tablespoon of vodka to see if the combination helps. However, I'll probably try a different recipe, as I actually wasn't blown away by this one. The lemon zest came out far too stringy (as it is wont to do) and gets stuck in my teeth. I think lemon ice cream works best as a side to a different dessert, which makes sense, as the Kitchn folks were having it alongside wedding cake. Having the ice cream straight up seems to lack balance; it needs something sweet to even it out.

Thursday, November 6, 2008

All Wrapped Up

Fajitas: Not the most photogenic of meals.

Given my recent lethargy in regards to new spur-of-the-moment creations, I have lately taken to prepping a single large dish at the beginning of the week and then eating it for the following five days until the weekend strikes and I have time to repeat the process. This one-week-meal concept can be seen in my recent lasagna post as well as an unposted (but upcoming, someday) tuna casserole one. Several friends of mine (well, one, generally ;) often remark upon this process wondering how I could possibly eat the same dish all week long (in some cases for two meals a day) and not get bored of it, and my usual response is to grunt noncommittally and continue daydreaming about corn pie. However, I figure this post presents me with a decent opportunity to expand upon my usual eloquence.

Truth be told, I certainly do get bored with the same meal all the time. Ideally, I would love to prep several large dishes over the course of a weekend, freeze some of the results, and then coast through a month off of a single weekend's worth of work. I do think it's safe to say that I would not get tired of this process so long as I had a relatively large pool of big (and freezeable) dishes to draw from due to the simple fact that leftovers are, to me, one of the greatest creations for lazy people all over the world. The idea that I can go the store and pick up ~$10 worth of ingredients and have the resulting meal last me seven sittings is something I draw a great deal of happiness from, as it appeals to both my lazy and frugal sides. I suppose one thing that helps keep these meals fresh over the course of a week is the memory of the number appearing on the cash register and winding up lower than the average cost of a single meal at a restaurant.

Of course, the catch-22 in this brilliant plan is the very fact that it stems from laziness, which tends to prevent one from spending an entire weekend prepping several dishes to be enjoyed over the course of a month. Indeed, it is often more than I can muster to put together a single dish, let alone several. As such, it is somewhat rare that I manage to freeze anything, and instead I wind up eating the same thing day in and day out. Boring, yes. Expensive? No, and that's probably worth its weight in boredom at this point.

Chicken Fajitas
(Method for preparing chicken stolen from Shari)

Ingredients
4 Chicken breasts*
1 tbsp Flour
1 tbsp Corn starch
2 tbsp Seasoning**
2 Medium onions
2 Bell peppers (whatever type you prefer)
1 Bunch green onions
3 Cloves of garlic
4 tbsp Butter
1/4c Soy Sauce
1/4c Hoisin Sauce
A crapton of cheese
Sour cream as desired

*Any cut of chicken will do, of course. I just happened to have breasts on hand.
**I didn't have taco seasoning on hand, so I mixed up some of my own: 1tsp onion powder, 1tsp garlic powder, 1tsp cayenne pepper, 1tsp chili powder, 1tsp ground cumin, and 1tsp some random steak seasoning that I wanted to get rid of. The steak seasoning had salt, so I omitted it from the mix; otherwise, add salt in there too.

Procedure

1) Slice the chicken into thin strips.

Note my bag of seasoning waiting at the top.

2) Toss the seasoning into a bag and mix with the chicken until all the pieces appear to be coated. Set the bag aside to absorb the seasoning for an hour or so (longer wouldn't hurt!).

Sexy? No. Delicious? We'll see!

Note: I don't recommend refrigerating the chicken, as I feel it gets a quicker sear and a better consistency from sitting at room temperature. Don't worry; it's sealed up, and even if some bacteria work their way in there, our seasonings contain natural antibacterial agents that will take care of things. Try to relax; you're so uptight!


3) While waiting for the chicken to finish soaking, chop your veggies to their desired consistency. I minced the garlic, chopped the onions into half-circles, and sliced the peppers into strips.

4) Heat the butter in the wok on high heat until it starts smoking (actual smoking, no wispy nonsense). Throw the chicken in there and allow the heat to come back up.

5) When the chicken starts to fry (you can tell from the bubbles boiling up in the butter on the edges), stir gradually to ensure that all the meat gets evenly cooked. More or less. At this point, add the garlic as well.

Notice the lovely browning we get on the portions of the chicken covering the pan. We want that everywhere!

6) When the chicken is cooked, scoop it out with a slotted spoon and set it in a bowl to relax for a bit.

7) Add the bell peppers and regular onions to the remaining sauce in the wok and stir fry in the same manner. If necessary, add a little more oil or butter.

Cooking the veggies in the residual chicken juice brings the flavors in the dish together nicely.

8) When the onions become translucent, add the soy and hoisin sauces and stir to coat.

9) Remove from heat and pour the entire mix into the bowl with the chicken. Add the green onions and stir to combine.

Ok, so hoisin and soy sauces aren't exactly Mexican flavors... but they taste good!

10) Wrap in a tortilla laced with sour cream and the aforementioned crapton of cheese and you're all set!

Lessons Learned
This is a fairly simple recipe; even I managed to not screw it up. However, this did teach me that I actually like yellow bell peppers, which leaves only green ones on my hate list. They brought a great sweetness to the spice from the seasoning mix, which turned out just about perfect (although somewhat heavy on the cumin--next time, cardamom or coriander perhaps?).

Wednesday, October 8, 2008

Burning Rings of Fire


Ahh, doughnuts... I realize that I wax hyperbolic about any number of treats in this forum (corn, cheesecake... oh, and pie, I suppose. Almighty king of cuisine that it is, after all.), but despite the fact that I have rather strong fondness for doughnuts as well, I've resisted attempting them for some time now. This is due to the very simple fact that making them from scratch scares me. There are few enough dishes that I'm unwilling to take on, and even fewer that I adore eating and still avoid, but doughnuts have resided at the top of that list since the idea first managed to lodge itself ever-so-gently in the back of my mind.

I have several reasons (or excuses, perhaps) for this irrational fear; after all, making home-fried doughnuts involves what would be considered a rather large amount of oil that burns like the fire of a thousand suns the moment it splatters onto my hand (as is, of course, inevitable when I do any amount of frying). Furthermore, I have trouble believing that I can surpass the culinary genius that I can experience firsthand in any donut shop for the meager price of ~$7 per dozen with any variety of sprinkles and glazes (not to mention fillings!). But perhaps first and foremost on my list of hangups with these doughy halos relates to the mass genocide of gassy little creatures that make all that is doughnut possible: yeast.

I've never worked with yeast in the past. It's one of those peculiar things that I read about, I understand (to some extent), and even have ready in my pantry--I simply never take that next step to start working with it. I suppose this is due in part to the fact that having never worked with these little bastards before, I really don't have a solid understanding of how to tell when things have gone wrong. With a steak, I can smell and see charring and know that I should reduce the heat. With brownies, I can see an overly-smooth batter and know that I'm going to be eating chocolate bread for a week. With chicken, I can just tell myself I'm going screw it up anyway so there's no sense worrying about it (at which point I make a quick trip to my local sandwich shop, hanging my head in shame. "Hi Shawn!" they'll say, "cooking chicken again, eh?" "Yeah..., just give me the usual.")

With yeast-dependent recipes, on the other hand, I know absolutely nothing, except that my recipe will never end up like the pictures I see online when I follow recipes stolen from others (hi Joy! I did try to warn you I'd be appropriating this one too!). And while I went into this experiment knowing that this was inevitable, I felt that it was time to conquer the fear. Glaring at my tiny packet of instant yeast, I ripped it open in one swipe, determined that I would be ruled by my emotions no longer.

... Naturally, my first opening attempt was a little overly-vigorous and I emerged coated in a fine layer of my would-be enemy. Grabbing a second packet and resolving to be on the lookout for more such trickery in the future, I set to work.

Yeast-Risen Doughnuts
(as "adapted" from Joy the Baker)

Ingredients
1 Package of instant-rise yeast
3 1/4c Flour
1c Milk
1/4c Room-temperature butter
3 Egg yolks
4tbsp Sugar
1tsp Salt
1/2tsp Cinnamon
1/2tsp Nutmeg*
1/2tsp Ginger*
1qt Vegetable oil

*I took some creative liberties with the flavorings, but as you'll see later, it really didn't make a difference.

Procedure

1) In a mixer bowl, mix the flour, yeast, sugar, salt, cinnamon, nutmeg, ginger, until well blended. Note that since I'm using instant-rise yeast, it will theoretically work without giving it a soak in warm water. Subsequent experiments have shown me that while this is true, the rise is much faster if you give it a bath anyway. Tempermental bastards, no?

2) Once the ingredients are homogenized, add the milk, butter, and egg yolks and mix with a dough hook attachment until the mess comes together. Continue mixing at medium speed for ~5 minutes.

3) At this point, you are left with a highly attractive looking lump of dough:

Look at 'em... you know they're up to something...

4) Sprinkle the surface somewhat liberally with flour and cover the bowl with a towel. Set it in a reasonably warm place to start rising (I found that the top of the fridge worked perfectly) and leave it there for about 2-3 hours, or until it has approximately doubled in volume.

5) Sprinkle a countertop with a dusting of flour and turn your engorged yeast lump out onto it. Gently spread it with your hands into a rough circle.

6) Use a rolling pin to roll the circle into a larger circle until it is between 1/4 and 1/2 of an inch thick.

7) Using a pastry ring (or biscuit cutter, or ... um... a tin can or something), cut out doughnut-sized rounds. Use a smaller ring to cut out the holes.

I'm not sure how one would cut holes when using a can, but I trust you can figure something out.

8) Re-roll the dough as desired to get more doughnuts. It's worth noting that the second and third rollings will not be as light as the first batch unless the dough is given more time to rest. Since I'm impatient, I just cut them all at once and said to hell with it.

9) Set the freshly cut doughnuts (and holes!) on a lightly floured baking sheet to rest for about 30 minutes. Coincidentally, this gives you just enough time to start heating your oil in a large heavy pot or skillet. Be sure it reaches at least 350F (or ripples lightly when left standing still) before attempting to start frying.

10) After the oil has come to temperature, carefully drop the doughnuts into the oil, one at a time. Do not attempt to fry more than 3 at once or the oil temperature could drop lower than we want and create soggy doughnuts.

They start browning rather quickly. Be sure to watch them carefully.

11) After about 2-3 minutes, flip the doughnuts with a slotted spoon (or, even better, chopsticks!) and allow to fry on the other side for another 2 minutes.

It's rather easy to tell when they're done... they should really be doughnut-colored.

12) Remove the doughnuts using the same spoon or chopsticks and place them on a wire rack to drain and cool. Repeat steps 10 and 11 with the remaining doughnuts and holes.

13) Glaze with whatever you desire; I'd make recommendations, but I wasn't entirely pleased with how my glaze turned out. I'd recommend finding a recipe that sounds intriguing for that aspect and steal it from there instead. (I used the one from Joy, as borrowed from Alton Brown; it was tasty, but came out very runny and never really firmed up as much as I'd have liked.)

You can see right through the chocolate coating in this version.

This is after I refrigerated the glaze for ~20 minutes and re-dipped the doughnuts. Much better, but still too soft to the touch.

Lessons Learned
Emerging from my epic battle only slightly scathed (damn that oil!), I discovered that the fear had vanished in the surge of triumph. I had destroyed my enemy in classic fashion, allowing no survivors and only slight casualties as a consequence. Still, the yeast had the last laugh; my doughnuts tasted exactly like a loaf of bread, and only the glaze had any chance of changing this. Heavy doses of chocolate and peanut butter calmed the yeast's overpowering taste, but I could hear the bastards laughing all the way down. Next time, I'm making chemically-leavened doughnuts, and to hell with these damn microorganisms. I'll save them for breads and pizza.

The Brownies that Weren't


Before I get started on this post, I feel I must mention that it's been a while since I actually created this recipe; in fact, I've managed to put off writing about it for the better part of three weeks thanks to a sizeable backlog that I managed to compile around labor day (as you've no doubt noticed). That being the case, I can barely remember how I put the recipe together, which is all the more unfortunate since it was a semi-original creation, and thus I don't have a recipe waiting in the ranks for me to reference. As such, I'll be working from my memory, which has been eroded by a steady diet of junk food and wine for the past several weekends. Who knows? Perhaps my memory will improve the results!

Due to a spontaneous lack of cocoa powder in my pantry, I was stymied when I felt like baking something familiar (like brownies, for example). Never being one to let adversity get me down, I decided that if I couldn't have chocolate brownies, I'd have peanut butter brownies instead. ... Er, blondies, I guess. Whatever they're called, I felt that if I had a brownie recipe and I had peanut butter, I could simply remove the chocolate, make some creative substitutions, and voila! Perfect blondies would result! As some might guess, this isn't entirely how things unfolded... (then again, the picture at the top looks good, right?)

Peanut Butter Blondies
(As adapted from my previous brownies recipe)

Ingredients
1/2tsp baking powder
1/3c butter, melted
1/3c peanut butter
1/2c cold milk
2c white sugar
2 eggs
2c all-purpose flour*
1tsp vanilla extract
1/4tsp salt

* Those familiar with my brownies may note that this is way more flour than usual. From my vague recollections, I decided to balance out the lack of cocoa powder with an increase in flour. I'm not entirely sure this is the ratio I used, but we'll go with it.

Preheat oven to 375F

Procedure

1) Mix all the dry ingredients (except the sugar!) in a large bowl with a whisk until well mixed.

Ok, I used a fork. Like it made a difference.

2) In a stand mixer (or another large bowl with a whisk), mix the eggs until lightened and aerated, as shown below:

They hardly look like eggs anymore...

3) While the eggs are mixing, attempt to mix the peanut butter with the melted butter. This step helps soften the peanut butter to a pourable consistency. Of course, the peanut butter doesn't always cooperate, especially when it's organic crap bought from Coscto that you're frantically trying to finish up so that you can never ever use it again. ... Just saying.

Stupid organic junk...

4) Slowly add the sugar to the egg mixture and allow to mix until combined.

It's worth noting that substituting 1c of brown sugar for 1c of white sugar in this recipe can make for added moisture in the end result; I might actually recommend this for future batches.

5) Add the butter/peanut butter mixture to the mixer and wait until combined.

6) Slowly add in the dry ingredients with the mixer on its lowest setting. Note that this step is saved for last because this is where gluten is introduced, which means that mixing time now makes the difference between peanut butter-flavored bread and peanut-butter flavored awesome. Mix only until the dry vanishes from the surface; better to have a few unmixed lumps than to have rubbery blondies.

I spout forth all this advice about gluten, but would you care to guess whether I remembered all this at the time?

7) Pour the mixture into a greased 9x9 pan and smooth out the top.

I actually used a 9x13, as I was making a double batch.

8) Bake at 375F for approximately 35-40 minutes, or until it looks like this:

Since mine was a double batch, I had to guess when they were done. I think it worked out all right.

9) Slice and serve as needed.

Lessons Learned
This was a great learning recipe, perhaps most particularly because I was mostly making it up as I went. That said, due to my mishap with my gluten mixing, my blondes were indeed more peanut butter bread than anything else. Still tasty, but the peanut butter was not strong enough (god I hate that organic junk), so next time around I'd omit butter entirely and substitute all peanut butter (e.g., 2/3c peanut butter). Another enhancement that occurred to me later on would be adding chocolate chips to the batch somewhere around step 6 above; chocolate is always friendly with peanut butter, and it could also add an interesting textural contrast. Nuts might also be acceptable.

Stacking Up the Week

You know there's enough cheese when there's a nice coat of oil on the top.

As of late, I actually haven't felt like experimenting with any new recipes; my drive for the unknown seems to have stalled due to a lack of energy and money. Unfortunately, my appetite doesn't always follow these lulls in my creative endeavors, and thus I am forced to create vast quantities of old standbys to last me through weeks of meals at a time, at least until my spare time catches up with my ever-expanding list of stuff to make (such as a frozen yogurt recipe that I've been informed I'm attempting). Enter: lasagna.

Pasta is an unquestionably uber dish if for no other reason that for about $1, one can buy enough of it to last an entire week, utilizing whatever appears to be lying around the house to supplement it. While lasagna doesn't represent the pinnacle of pasta's flexibility, it does represent the blessed union of two culinary greats: meat and cheese. And my version of it uses lots of both. Of course, the best part of this recipe was simply that aside from the noodles, I had all the other ingredients on hand and waiting to be united in harmony just in time to be chilled or frozen to take the dish to that next culinary level that is leftovers, which pasta lends itself to even better than most things.

But my ramblings aside, I present the recipe itself. As always, it didn't turn out exactly as I would've hoped, but I still ate every last bit of it (and it only took a week!).

Lasagna
(as adapted from my mom's recipe, designed for a 9x13 pan)

Ingredients
1 Package of Lasagna noodles
1lb Mozzarella cheese, shredded
1lb Cheddar cheese, shredded
2lb Ground meat*
2 Medium yellow onions
6 Cloves garlic
1 32oz Jar of tomato sauce
1 12oz Can of tomato paste
Parmesean as desired

*Any type of ground meat can be used, of course; my mom always used ground turkey. In this instance, I used 1lb ground beef and 1lb pork sausage, as they were both cheap.

Preheat oven to 350F.

Procedure

1) Gather all your ingredients into one compact location, preferably with a large cutting board and knife at hand.

Ok, you may have to move the ingredients aside to actually do any cutting...

2) Start a large pot of salted water to boil.

3) Mince the garlic and dice the onions. Their respective consistencies can vary according to your individual taste or how lazy you're feeling when chopping.

4) Heat a medium-large saucepan over medium heat and add the ground meat. After it has started to brown, add the onion and garlic.

Use a spatula to try and spread the meat around for even done-ness.

5) At this point, your water should be boiling, so add the noodles and stir to ensure they get completely submerged.

6) Cook the meat until the onion is translucent and the meat has become entirely brown.

7) After the desired color has been reached, remove the saucepan from the heat and drain off the excess fat. Stir in the tomato sauce and paste and set the aside for now.

8) When the noodles have reached the desired consistency (they don't have to be completely done yet, as we're baking them in a sauce anyway), drain them into a collander and allow to air out for a bit.

9) In the 9x13 pan, spoon a light coating of the sauce onto the bottom of the pan. This step prevents sticking.

10) Layer some of the noodles over the sauce; note that you don't want them too thick, so just use a single layer. Then cover the layer with more sauce.

You can see from my sauce that I was particularly lazy when dicing the garlic!

11) Add a layer of mozzarella and cheddar on top of the sauce. Don't skimp now! If desired, add parmesean to the mix as well.

12) Repeat steps 10 and 11 until the pan is full. Be sure to save the thickest coat of cheese for the top.

I only managed two layers of noodles, it appears. Next time I'll have to use a roasting pan.

13) Bake at 350F for about 30 minutes, or until heated all the way through and the cheese has melted.

Lessons Learned
I've made this fairly frequently in the past, so there wasn't a lot of experimentation here. However, completely forgot to add any herbs to the sauce; normally I'd add basil and oregano after it has finished cooking. I also added salt to the meat out of habit, since just about every recipe calls for salt at some point or another. Resist this urge! The cheese adds plenty of saltiness, especially if ample parmesean has been used. Plus, more cheese can always be added afterwards.

Monday, September 15, 2008

Rainbow Roughage

Despite the rather pedestrian appearance of the meal above, it represents an experiment--a test, of sorts--that I am conducting upon myself, your faithful writer. As a personal challenge, I have taken it upon myself to pick up one ingredient--be it vegetable, meat, marinade, or anything in between--each week that I have never worked with before and put something together using it to what will hopefully turn out to be a palatable dish. So far... well, the important part is trying. And although this week's dish may not look beautiful, it was still edible, and not a bad first attempt, as far as I'm concerned.

As the title of this post may suggest, this week I picked up a bunch of rainbow chard, both because I'd been curious about it in the past and because colorful items rank just below shiny things on my list of personal distractions. Entering into this, I knew nothing about chard, regardless of its prismatic orientation, and determined to remedy the situation post-haste. Unfortunately, some quick internet research turned up a strange dearth of interesting chard-related recipes, none of which utilized anything I had on hand aside from the chard itself. Undaunted, I delved deeper into my pantry and decided that a bag of brown rice I had lying around would make a perfect side dish for the vegetable's finished product.

Having set the rice maker to "rice", I set off in search of protein. After a brief survey of my refrigerator's sparse contents, I emerged from the frosty wasteland with some leftover pork tenderloin and a bag of bean sprouts. I love bean sprouts, but they have the irritating tendency to spoil approximately 2 minutes after I pick them up off the shelf at the store; consequently, I had to use the damn things up before I had to throw yet another half-empty bag of them away. As for the pork... well, I needed protein, and pork tends to be fairly malleable when it comes to flavor. Ingredients in hand, I stared at them on the counter for a few minutes, mind a-whirling, in hopes of finding some inspiration. Given that I was hungry already, I decided a fast concoction would definitely be best. And what better fast-cooking method can there be than a stir-fry?

Stir-fried rainbow chard with pork tenderloin
(Well, it's not a real recipe, so I figured a descriptive title would be best)

Ingredients
1 Bunch rainbow chard, chopped
1 Leftover chunk of pork, sliced thin
1/2 Bag of bean sprouts
2tbsp Hoisin sauce
1tbsp Oyster sauce
1tbsp Soy sauce

Procedure
1) Heat 1 liter of water in a wok or large saucepan until it just reaches a boil.

2) Add the chopped chard and boil for 1 minute.

Ok, so it's not really all that fried. I figured boiling couldn't hurt, if it's really fast.

3) Remove the chard to a colander and allow to rest for a bit.


4) In the same pan, add the hoisin, oyster, and soy sauces and mix briefly. Add the pork and shake to coat.

Of course, the sauce choices will vary based on personal preferences.

5) Cook until the sauce has mostly disappeared.

This method works particularly well for meat that was undercooked to start with.

6) Add the bean sprouts to scoop up the remaining sauce and shake to combine. Or stir. I prefer shaking, as it's more impressive and reduces cleanup.


7) Remove from heat and add the chard back into the mix. Shake or stir to combine the ingredients. Serve alongside the rice prepared previously.


Lessons Learned
Chard is bitter. As such, I think it can benefit from strong flavor combinations; this dish was somewhat weak, and the chard came through very strongly. It still tasted good, but I might consider a stronger sauce if I made it again. Otherwise, it was a satisfying spur-of-the-moment dish, so I can't really complain. I can only hope my future experiments work out so smoothly.

Custard Crackup

My affinity for cheescake may not be well-documented, but rest assured, I consider it one of the greatest sweet creations since the development of pie. For those of you who are pointing out that a cheesecake is basically a cream pie made with cheese, you're absolutely correct; does that make me wrong? Pie is the single greatest thing in the universe; it is to food what Chuck Norris is to an average human. Pie has the capacity to end wars, right wrongs, and leap tall buildings with a single bound, all while still being delicious in every single form (with the possible exception of pumpkin, but I'm willing to let that one slide).

But I'm not here to talk about pie. Well, not entirely (just watch for future entries!); instead, I'll continue with the pie that is cheesecake. It should be pointed out that I do not own a springform pan. I hate the things; they're messy, they leak, and they serve only a single purpose (delightful though that purpose may be). As such, all my cheesecake creations thus far have resided in a single 9x9" square pan. Is it the best vessel to bake and display the greatness that is the cake (or pie!) of cheese? Most certainly not. Does it get the job done? So far, yes.

With that out of the way, my last adventure with cheesecake (which went sadly undocumented) led me to discover that some recipes call for cheeses *other* than cream cheese. As this had never occurred to me before, I had to investigate further, and, of course, test out these recipes for myself. I've never been a big fan of ricotta cheese; to me, it tends to be bland, lifeless, and I really don't like the texture, as it's not what I expect when I think "cheese". As such, it was a perfect candidate for my cheesecake experiment. And so, after some lengthy research, I settled on stealing a recipe from FoodTV's resident female Italian food expert, Giada. It should be noted that I took some liberties with the actual ingredients, but I stayed more or less true to the recipe itself.

Ricotta Cheesecake
(heisted from Giada de Laurentiis)

Ingredients
Crust
2c Rolled oats (ground coarsely in processor or blender)
1c Brown sugar
1c Butter (melted)

Custard
6tbsp Butter, melted
16oz Ricotta
16oz Cream cheese
3/4c Sugar
1/4c Honey
1tbsp Lemon zest
4 eggs

Preheat oven to 350F

Procedure

1) In a large bowl, mix the ground oats and the brown sugar thoroughly. Add the butter and mix until it comes together.

2) Press the crust into the bottom of a greased 9x9" pan and bake at 350F for 15 minutes.

3) Remove and set aside to cool. Be sure to cool the crust for at least 10-15 minutes before adding the cheesecake mixture!

I used oats because I ran out of graham crackers.

4) In a mixer bowl, mix the ricotta on its own until it is reasonably creamy. Add the cream cheese and mix thoroughly.

I wasn't sure what "creamy" looked like for ricotta, so I didn't worry about it overmuch.

5) After the cheeses have mixed a bit, slowly add the sugar, honey, and lemon zest.

I almost forgot the eggs at this point, as it was so creamy already!

6) Add the eggs, one at a time, and mix until thoroughly blended.

7) Pour the mixture onto the prepared crust and bake at 350F for about an hour. Start checking it at around the 45 minute mark, as some ovens will vary. It's ready to come out when the center jiggles slightly and still resembles a liquid, but the outside is firm.

8) Allow the cheesecake to cool to room temperature on the counter, then refrigerate for at *least* 4 hours. Overnight works better.

Lessons Learned
As seen in the first image of this post, this recipe taught me the value of adding that pan of water that most cheesecake recipes call for during baking. I didn't mind the cracked-ness of the end product, and it still tasted good. That said, I don't care much for the honey flavor of it; I prefer a pure cheesecake flavor. Overall, I really didn't notice much difference using ricotta instead of all cream cheese, so I probably won't bother doing it again, as cream cheese is far cheaper than ricotta these days.

Great Cukes of Fire

As my recent salsa post demonstrated, this Labor Day was a celebration of all things spicy (but not too spicy, as hot things make me cry like a little girl), and if you're anything like me, when you hear spice, you think "cucumbers"! No? Just me? Whatever.

Ok, in all honesty, I chose to add this recipe to my repertoire for two reasons:
1) I'm a cucumber fanatic. Cucumbers are almost as high up as corn on my list of things placed on this planet as proof that we are meant to be happy.
2) I saw a recipe for an enhanced version of the traditional boring cucumber salad that seemed suitable to my tastes.

Now since no stolen recipe would ever be complete before I have a chance to completely tweak the hell out of it, I stole the concept from the aforementioned recipe and then modified it with what I felt were improvements at the time. In retrospect, the original might be better in some regards, but I stand by my decisions. For those who are interested, compare the original recipe with my own; the alterations are rather apparent.

Better Cucumber Salad
(adapted from the Flexitarian Menu)

Ingredients
2 Medium cucumbers
2 Medium carrots
1 Bunch green onions
1 Medium yellow onion
4 Cloves garlic, minced
2tsp Sugar
1 Lime's worth of juice (about 1/3c)
2tsp Rice vinegar
1tsp Cayenne pepper
1/4c Chopped mint leaves (fresh, if at all possible)

Procedure
1) Slice the carrots and cucumbers into rounds as thin as possible (doesn't have to be translucent; just try to get them thin).

I like using a ridiculously large knife for such exercises.

2) Chop the yellow onion into half-circles (i.e., chop in half, then slice thinly) and soak the sliced results in cold water for about 10 minutes. This process reduces the harshness of the onion flavor; you can omit it if you don't mind the bite they bring.

3) In a large bowl, mix the sugar, lime juice, vinegar, pepper, garlic, and mint.

4) Add the carrots to the mixture and mix thoroughly.

I did the carrots first in hopes that the acids in the liquid would soften them a bit. This didn't work, of course.

5) Slice the green onion and add it along with the cucumbers to the bowl and mix again.

6) Strain the yellow onion slices and add them to the bowl. Mix thoroughly to get all ingredients coated with the flavorings.

Lessons Learned
My guests loved the flavor of the salad, but mentioned that the carrots were a bit tough to manage. In my next attempt, I'll try to lightly sautee the carrots in some butter until they *just* start to soften, and then use them as I did above. The idea is to get them to be only slightly crunchier than the cucumbers themselves. Still, I consider this recipe to be a great success, and it will indeed be repeated in the future.

Fresh Tomato Salsa

Labor Day: That last hurrah before summer closes. Not that I'm ever particularly attached to summer, mind you; by the time September finally rolls around, I'm generally all-too ready for some pleasant fall weather (fall being my favorite season, but we needn't get into that here). However, I *am* always in support of getting a day off of work, and what better way to celebrate such a day than by having a few friends over with a large complement of snacks and grilled food?

This year being no exception, I had a strong craving for my favorite Mexican "dips": guacamole and, of course, salsa. I've never been terribly drawn to the salsas I've had made with cooked tomatoes, as I like the chunky fresh style. As such, I decided to see how easily I could put together a whole mess of it. As you may have guessed, it wasn't difficult, and yes, it was tasty. Now you may wonder exactly how much of a "recipe" there is to salsa, and I'm inclined to agree; that's why I simply referenced Simply Recipe's version for a basic shopping list before twisting things in my own way.

Fresh Tomato Salsa
(adapted from Simply Recipes)

Ingredients
5 Medium tomatoes (romas work great for this)
1 Red onion
3 Chiles (any type you desire)
3 Cloves of garlic, minced
1 Lime's worth of juice (about 1/3c)
1tbsp Olive oil
1/2c Chopped mint*
Salt to taste

*I use mint because I can't stand cilantro. Judge me if you will, but this actually turned out rather nice. Of course, purists will want to use cilantro instead. To each their own.

Procedure

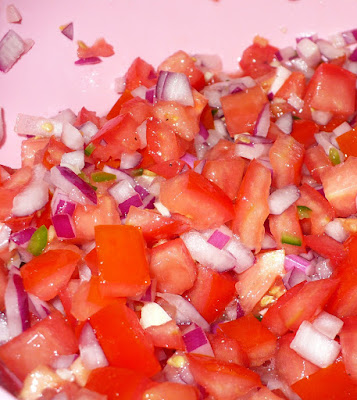
1) Gather all your components together to make for quick and easy knife work.

Yes, I used 6 tomatoes. It was too many. Always use less than you think you'll need, as it's easier to add than remove them.

2) Dice all the vegetables to the size desired. Since individual tastes may vary, use your own judgement on the size of the chunks.

3) Add the olive oil, garlic, and lime juice and mix in a large bowl until well-blended. Add salt as desired, keeping in mind that the chips will probably also be salted.

Lessons Learned
You might think it's hard to ruin salsa. You're partially right; it's hard to completely destroy, but it's also rather hard (at least for me) to get *perfect*. This version was not it; I went heavy on the tomato and light on the spice. Next time, I'd reduce the tomato a bit and add another pepper (and probably use something stronger than jalapenos for spice). As a final modification, after it sat for a bit, the juice from the tomatoes came out and left a lovely puddle at the bottom for all the components to marinate in. Next time, I'd probably remove the juicy interior of the tomatoes and use just the fleshy components for texture and flavor. That probably also would've enhanced the strength of the spice, making for a better balance and more stability on the chip. Still, I ate the stuff, so it certainly wasn't all bad!

Thursday, August 21, 2008

Fahrenheit -451


I have a confession to make, my dear readers: I actually made this recipe before the Hostess fiasco detailed below. In my vanity, I chose to post the pocket pie disaster before this one so that I could swiftly cover up my failure with a subsequent success. I'd be ashamed, but somehow, I think I'm OK with it. That said, this recipe is not a complete success, so consider this my way of easing you back into my usual batches of perfection incarnate. I like to try and make things easy on all involved.

As many folks know, with the purchase of a KitchenAid stand mixer comes the opportunity to purchase a myriad of different devices to attach to said mixer in order to perform a variety of different tasks. When the mixer is upgraded with said attachment, one can grind meat, make pasta, juice veggies, and (presumably) produce quality food products by day and fight the forces of evil by night under the psuedonym "Voltron". (Note that I haven't attempted that last one yet, but it is indeed advertised in the KitchenAid attachment catalog. Go ahead! Check for yourself.)

This overly-verbose intro is my long-winded way of saying that, despite my resistance to spend additional money on products to continue cluttering up my kitchen, I decided to succumb to temptation and buy the KitchenAid ice-cream maker add-on kit (and for approximately the same price I paid for the mixer itself, I might add). As of late, The Kitchn has been running an ice cream making contest, asking readers to submit their best recipes, and after a week or two, I could no longer resist. At this point, I needed a maker, and rather than pay for an additional appliance, I figured getting the expansion for the mixer was a savvier (and more space-conservative) purchase.

Naturally, I was eager to get my device up and running, so after waiting the appropriate 24 hours to freeze the bowl, I readied up my first trial recipe, selected mostly because I'm well-known for having a penchant for all things peanut butter and chocolate oriented.

Peanut Butter and Chocolate Ice Cream
(as adapted from Joy the Baker, although hers looks significantly prettier than mine)

Ingredients
2c 1% Milk
1c heavy cream
1c sugar
1/3c natural cocoa powder
1/4tsp salt
3tbsp Corn starch
1/2c semisweet chocolate chips
1/4c bittersweet baking chocolate chunks
1/2c organic smooth peanut butter

As you can see, I took some creative liberties with the recipe, none of which had any adverse affect on the end result, in my opinion. I still recommend reading Joy's entry, as she does a much better job of it than I do.

Procedure
1) Place a sauce pan on medium heat and add 1.5c of the milk and half of the cream. Allow the liquid to warm up (although do not bring it to a boil).

2) Add the sugar, cocoa powder, and salt, and whisk to combine.

The mixture will take some time to get incorporated.

3) Whisk steadily until the powder dissolves completely (although some chunks are always going to remain).


4) In a separate bowl, mix the remaining milk and the corn starch until it is smooth. Note that you can't let this sit for very long or else it'll solidify, requiring further mixing.

5) When the heated mixture begins to steam, add the corn starch mixture and bring to a low boil. Whisk steadily until the solution reaches a pudding-like consistency.

Note: Do *not* eat the pudding. It'll be much better as ice cream anyway.

6) Turn off the heat and mix in the remaining cream, chocolate chips, and baking chocolate. Stir until the chunks melt and are incorporated into the mixture. Pour the mix into a bowl and chill, covered, for at least 4 hours.

The chilling process allows for a creamier ice cream.

7) Once the mixture is well-chilled, assemble your ice cream maker and follow its instructions. Note that it's important to have the churner moving before adding the ice cream base, or else it may not incorporate properly.

...Yeah, so it was harder to pour in than I had anticipated. Look at how little clearance I have between the bowl and the beater!

8) After the mixture has thickened (generally about 30 minutes), disassemble the device and move the ice cream into a freezer-safe container.

9) Use a spatula to fold in the peanut butter. Do not overmix, as you want a nice streak of peanut butter running through it, not total incorporation.

10) Place your ice cream in the freezer and allow to freeze (or "cure") overnight. Yes, it takes that long (depending on your freezer--mine sucks); I only gave it 4 hours and it was still "pudding-y". Delicious, but not ice cream.

An example of improperly-cured ice cream. Yes, it was great, but it wasn't very well frozen, and was basically like eating frozen pudding.

Lessons Learned:
Contrary to Joy's instructions, I feel that adding the peanut butter during the churning process (even at the end) caused too much incorporation of my peanut butter. While this recipe tasted fantastic, as you can see from the images above, pouring something that's pudding-like in consistency into a very small opening can be difficult. As such, I don't know that corn starch-based ice cream recipes are my favorites; next time, I'll try a custard-based chocolate recipe and simply fold in peanut butter at the end. Still, this made for a very delicious semi-failure; one can only hope all my mistakes taste this good.